Prior to getting my students to write I like to give them time to talk about their ideas, out loud, with a partner. This helps them generate ideas and synthesize their thinking. Sometimes we skip the oral discussion part and I just get kids to write freely ...depending on the writing task, that works too! However, for our first crack at persuasive writing I knew that the oral component would result in stronger, well thought out arguments when it came down to the writing part.
I stumbled upon this "Would You Rather..." activity on my FB feed the other day and knew it would be the perfect 'hook' for my persuasive writing lesson. You can grab it for FREE!
It's such a fun intro to persuasive writing because, let's face it: who doesn't love talking to their best bud during class about ridiculously funny scenarios.
For each question, I got students (in pairs) to highlight their choice, then they had to come up with at least 3 reasons to defend their opinion. They did this orally first.
If their buddy made the same choice, they could come up with reasons to defend the choice together. If the opinions differed, they were encouraged to challenge the validity of their partner's arguments. This inspired students to think critically about their reasons and also helped to eliminate 'weak' reasons such as, "...because I like it".
After going through all the scenarios, students selected ONE to write about.
I think throwing in a bit of 1. choice 2. humor and 3. time to think ideas through with a buddy, really helped my students when it came down to the writing part! Plus, the fact that my kiddos were engaged and laughing while learning made this lesson a home run in my books. But, they weren't the only ones having fun.. eavesdropping was hil-ar-ious! Eight year olds say some pretty funny things!
Making ice cream is such a delicious way to show your class how solids, liquids and gases connect to everyday life... especially life in the kitchen!!
During our Discovery Day we made ICE CREAM with the munchkins!! We followed the steps in this YouTube video to make our ice cream:
When you do this activity, you'll need to make sure your students shake the bag REALLY well... otherwise the experiment won't work and you'll have some disappointed kiddos on your hands.
It can get tiring after a while, so we had each student shake the bag for a bit and then they passed it onto the next person. This way everyone got a chance to be involved as well!
I haven't tested the video below out yet, but it looked too good not to share!! I might make it my little weekend project to test this recipe out...mmm!!
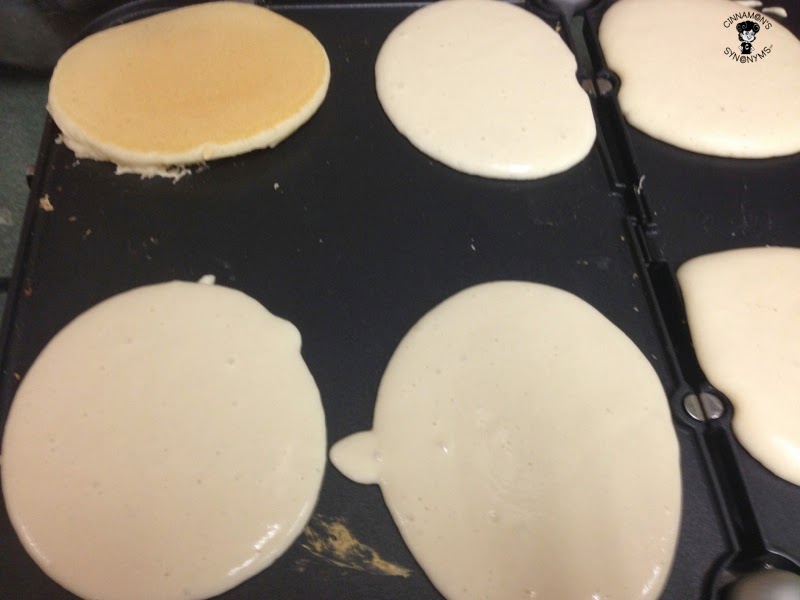
The other Discovery Day station we organized was a pancake station.
Our students sure had fun, and I just loved how each experiment we did showed them the various factors that can turn a liquid into a solid:
Teaching science vocabulary in an engaging and hands-on way is definitely the best way to get students to understand new terms and concepts in science!
As the proverb goes:
"Tell me and I will forget. Show me and I will remember. Involve me and I will understand"
Also, by keeping my Matter Spot It & Steal It game out throughout the year, these important science terms will stay fresh in students' minds! The game is perfect at a center; for early finishers; or for those moment when you just need to fill in 5 minutes before the bell rings!
Now for a little side note:
If you follow my blog and have been waiting for me to put up this post...would you believe that this was ready to go ages ago... I was just hoping to add some pics of my students playing the Matter game before posting. I'm always forgetting to take these pictures and planned on doing that today...
... then this happened:
SNOW DAY!!
Do you see the imprint of my door, ha! Oh, and this is a morning shot... blah... I hate how dark winter mornings are :(
Determined to publish this post no MATTER (pun intended) what... so it doesn't end up staying in my 'drafts' folder forever, I figured maybe the pics of my students having fun with the game will just have to wait!
Posted! Goal accomplished!
Now time to snuggle with my boy while watching a movie!
Snooowwww dayyyy!! Wooo hoo!!
In my last post about "Making Butter", I said to check back soon because I'd be blogging about more fun ways to teach 'solids and liquids'... little did I know that it would take me nearly 4 weeks to get to this post. I'm so sorry. I have a tendency to bite off a bit more than I can chew (both literally and figuratively haha!)... sometimes this means my blog gets a bit neglected.
Although this happened before the winter break, our 'Science Discovery Day' was way too much fun not to blog about... even if it did happen nearly a month ago (wow, time flies!!).
Since there are 6 of us teaching grade 2, we all paired up and took control of a 'station' which we set up in our classrooms. Our classes also paired up and traveled from room to room visiting each station throughout the day.
When we were planning the discovery day I knew I had to run a station that involved oobleck. This solid/liquid just fascinates me! (I'll admit, I'm like a child... I get excited by the littlest things!)
Oobleck is really easy to make. All you need is 2 cups of cornstarch for every cup of water.
We added green food coloring to make it look a bit like slime.
This kiddo was having fun doing "magic tricks" with the oobleck:
When you let the oobleck sit, its starts to get all runny. The more you move it around, the more it behaves like a solid.
The moment I caught sight of this little girl, my heart just filled with joy. Ah kids... so carefree and oblivious. You should have seen her face: white powder ALL over!
During my planning period, I just had to sneak a peak at some of the other classes to see how things were going. I will blog about that in Part 3 of my Solids and Liquids series. (The post will include tips on how to make ice cream with your class!!).
To help my students keep new science terms fresh in their minds, I created this fun little game. You can grab it HERE. (UPDATE: This game is undergoing revisions and will be available in my store soon.) The game helps students build science vocabulary in an engaging way!
We are starting our water cycle unit next... I think it just makes sense to teach it next so students can see how solids, liquids and gases connect to the water cycle! I created these word wall cards as another way to reinforce new science terms. You can get these cards HERE. [Note: In the word wall set, the words "solid", "liquid", "gas", and "matter" are also included].
Alrighty... stay tuned for my ice cream post... I'm hoping I get to it faster than 4 weeks :S How people manage to blog every day bloggles my mind (ha, get it.. boggles, bloggles)... It's late... I should go to bed... cheesy jokes start when I'm sleep deprived ;)
Yesterday, we had a special visitor from the dairy farm!
We learned how to make butter!! It was definitely a fun intro to our unit on solids and liquids!!
First, we looked at all the products you can make from milk. I would seriously cry if I ever became lactose intolerant... ice cream, cheese, whipped cream, butter... ohhh... I love dairy!
Next, the munchkins sorted the products.
Then...
We had to test out the steps to see what would happen!!!
They had way too much fun with this next step. Do you see my boy in red... he was warming up for his turn! Ha, ha!
This part was important!!
So, after a bit more shaking, it started to look (and sound) just right!
Do you see the butter. It's like MAGIC!
Mmmm.
Creamy goodness!
This activity was a great way to inspire some descriptive languagebecause all of our senses were used during the butter making process!
To SPICE UP their vocabulary, I modeled other ways of saying “soft”, “smooth”, “yummy”, and “yucky”! Yes, that's right.. 'yucky'... because a few of my kiddos were reluctant to try the butter. They missed out though... it was absolutely creamyand scrumptious!
I. LOVE. CHOCOLATE! I seriously think I overdosed on treats this week! The worst part of this confession? Each night after my boy went to bed...I would sneak into his bag of treats to get my sugar fix. This is what a chocolate addiction does to a person. You are probably thinking,"Stealing treats from a little child? How dare you?". Well technically I worked just as hard to get those treats... I did take him trick-or-treating ...in the RAIN!! So, I think I deserved each and every moment of those endorphin releasing highs!!!
On Monday, my grade 2's couldn't stop talking about all the fun they had trick-or-treating. So, as any teacher would... I made the most of their post-Halloween excitement and planned a couple of lessons around it. We did a fun writing activity (which I will have to blog about later) as well as some graphing.
I got my munchkins to bring in some of their Halloween candy and we allowed these sugary treats to make a guest appearance in our math lesson ;) Yes, that's how you SWEETEN UP your graphing!
Prior to Sorting and Graphing:
First, we reviewed some features of a graph and discussed important graphing vocabulary.
Building math vocabulary is just as important as building the critical thinking skills needed to succeed in math. I have come up with a fun way to do that this year.
Before they play the game, they need to get familiar with the graphing terms. I posted up some of the bright picture cards (which are from the game) and the class had to figure out which words matched the pictures. I will introduce more math vocabulary in the coming weeks, but for our first lesson, we just reviewed the basics...
Although we weren't working on a pictograph (or 'picture graph' depending on where you're from) we added it to the word wall because it came up in our discussion. We talked about why a pictograph might be more feasible in day to day life (versus a concrete graph). For example, using real objects might not be a practical way to represent data in everyday life but using pictures to represent real objects is! Our graphing activity will be a nice segue into pictographs, so I figured, why not review the word!
Putting It In Action:
Some were better than others at planning their graph, BUT that's OK! I will use this info to guide my instruction over the next couple of weeks. I will definitely have to review labeling and 1-1 correspondence with a few of them.
This little girl is helping her friend understand why his graph shouldn't go up to 15.
Wow! This graph impressed me! Although...after looking at it closely, I realized that even this student had troubles with 1-1 correspondence. We will definitely add "1-1 correspondence" to our vocabulary (and word wall) next week! The great thing about the vocab cards is that it also serves to remind me of all the topics I need to cover!!!
Once my grade 2's are a bit more familiar with ALL the vocabulary cards, I will take them off the word wall and my kiddos will be able to play the Spot It & Steal It game! The game helps to keep important terms fresh in students' minds throughout the year! Plus, taking the words down frees up precious bulletin board real estate...so I can add my next set of math vocab words! (I will be creating more vocab cards/Spot It & Steal It games to cover all areas of math! )
How to Play:
Each player places 3-4 picture cards out in front of them. Players take turns picking up a vocabulary card. The first person to SPOT the matching picture card yells STEAL and gets to keep the card!
If the card is in front of you, and you notice this before someone yells steal... you can SLAP the card so that NO ONE CAN STEAL IT!!!
This one was inspired by all the gorgeous pumpkins and squash at my local supermarket!
So many wonderful shapes, SIZES,colors and texTurES!
The goal of this lesson: Inspire students to be more descriptive by getting them to use their5 senses.
The activity we did was simple... we focused on writingdescriptive words, drawing detailed pictures and labeling.
I encouraged my kiddos to SPICE UP the over-used words "big", "small", "rough", "smooth", "yummy" and "yucky"... but they also came up with some great adjectives on their own. It just goes to show how students are more likely to write descriptively if their senses are immersed in the experience! I was impressed!
If you would like to try this with your class, you can grab a copy of my 5 SENSES BOOKLET HERE. It's FREE [Update: I've taken this freebie down as I'm working on updating it to make it better]! You can also use my PICTURE THESAURUSES to spice up your students' writing throughout the year!
Now, grab yourself a pumpkin spice latte (don't tell me this post didn't leave you craving something pumpkin flavored!) and check out some more fall ideas from my Lesson Deli friends!
I am not an artist working on improving my artistic skills (see what I did there... I replaced that negative self talk with something a bit more positive!). Although I am getting better, I can't deny the fact that I can barely draw a dog to save my life. Once, I was trying to draw a dog on an anchor chart and when I was done, a very honest 8 year old commented, "That looks like a dog-chicken!"
*Sniff*
Needless to say, I was thrilled when I found this gem of a video! I was actually looking for videos that would help meteach my students, but I found something even better... an art teacher to teach my students! Ha! I could not resist using this YouTube video as my 'substitute art teacher' for a solid 6 minutes and 29 seconds!:
The video is targeted towards kindergarten kids but I think this aspect makes it perfect for students of any grade! When it comes to directions, children and adults alike benefit from slow, step-by-step instructions (I know I do!). Also, many of my students are ESL learners, so this video was just perfect for them too!
The great thing about using a video to teach art is that you can pause, rewind or re-play the lesson for students who need extra time or just need to re-visit a step. I loved this aspect of using video to teach my portrait lesson!
To help her draw her portrait, the artist uses a mirror. I don't have 20 mirrors in my class... BUT our school has an iPad cart... so, my kiddos put it in selfie mode and used this to attend to the details of their faces. I thought this was a brilliant idea (if I do say so myself)! Students also practiced taking portrait style photographs of each other which was a fun way to add a quick mini lesson on photography. They had the option of using their photograph or "selfie mode" to help them as they worked on their portraits.
Here is an example of how they turned out!
DAY 2 - BUILDING POSITIVE SELF TALK
I read the book, "The Way I Act", by Steve Metzger.
{Note: The posters seen in this picture can be found HERE}
This book is PERFECT for inspiring students to build positive self talk and it was a great tool for sparking dialogue amongst my students. Bonus: The image on the cover was a good reminder of what a portrait entails - a close up shot, from the shoulders down!.
As I read each page, I turned to my class and asked them to reflect upon a time when they demonstrated each character trait mentioned in the book. By asking them to reflect, and share memories that highlighted their character, I was getting them to build evidence to support their beliefs about themselves. This exercise strengthens and shapes positive self talk. Saying words like "I am ...." is powerful, especially when supported by events in one's life because it helps to strengthen the belief. Tony Robbins - you know, the energetic author and motivational speaker - encourages this exercise in his books.
My students were displaying all sorts of positive self-talk as they shared their stories. Let me tell you, it is heart warming to hear young children reflect upon moments when they were courageous, or accomplishments that made them proud! My heart melted several times during this sharing period!
As I read the story, I also introduced synonyms for each character trait by referring to my character posters. {You can get a free posterHERE!}. Along with the posters, I use rafflesto positively reinforce my students for demonstratingspecific character traits. Praising children in this way helps to build positive self talk because these words of affirmation (saying things like, "Wow! You are so responsible!") influences how a child will perceive him/herself.
I love all the positive words my students used to describe themselves! Just look at how perfect these turned out:
Not only do I love how these turned out... the best part is... I'm over hearing my students use this vocabulary in their conversations with each other.
For example, the other day one of my students said to me, (after quietly observing me getting frustrated with annoying tech issues I was having):
This made my day, not only because she used this fabulous 'spiced up' word but becauseif she was telling me to persevere, she is likely to use such vocabulary when faced with a challenge of her own. This is what self-talk is all about!
Of course the beauty of having an 8 yr old tell you to persevere is just perfect all on its own!


.JPG)




.png)


