Showing posts with label Science. Show all posts

Tuesday, April 14, 2015

Go Green!

Earth Day is just around the corner... but at our school Earth Day truly is EVERY DAY... because we are an ECO SCHOOL! Nevertheless, it is nice to have these special days to inspire extra awareness around the impact our decisions have on our planet!

Several weeks ago, our school celebrated Earth Hour by turning off all the lights for an hour and unplugging our electronics! Our window lets in a lot of light so we didn't have to work in complete darkness at all.  It was neat because it made us realize just how much energy we actually get from the sun. Maybe we will work with the lights off more often!

I introduced the class to my Go Green Spot It & Steal It game cards the week of Earth Hour and we've been using the pack for various activities ever since...not just for playing the game!


You can use all my games in the ways I'm about to describe...so if you have the Figurative Language set for instance, you can use the same strategies.

One example: Instead of creating my own anchor chart, I like having my students get involved in the process. We use the black and white versions of the game cards to do this!

Recently, I asked my students to brainstorm ways that we could be kind to the Earth. Each time a student mentioned an idea that I had a "picture card" for, I handed the black and white version of the card out to the student who shared the idea. For this game, I had enough cards to hand out to everyone. For the games where I don't have enough picture cards for the whole class, I just use the colored cards and have students put them up as key ideas/concepts are mentioned. {You can see an example of how I did this with my Graphing Spot It & Steal It cards HERE}

After our brainstorming session, students colored in their cards:
Then we pasted the cards onto chart paper! You could also use the cards to create a display or make a class book! For the book, you can have students write a blurb about how they conserve energy at home and place this with the picture.


I think there's real benefit in doing a collaborative anchor chart because students are more likely to refer to it if they played a role in creating it.

We are now working on creating Earth Day posters! Students used the anchor chart to come up with ideas for their posters! Since they had tons of ideas to refer to, they had no problem coming up with a plan!  Below, you can see students gathered around the chart!


Next week we will play the game!

So you see, my Spot It & Steal It games can act as a word wall (see that post HERE); you can create an anchor chart; have students write a class book; put the cards up on a bulletin board for a visual reminder; use it as a GAME to review concepts... and more. The options are endless!

Here are some more of my Spot It & Steal It games! Click on a box to learn more!

Monday, February 2, 2015

Solids and Liquids Part 3: Making Ice Cream in a Bag

Making ice cream is such a delicious way to show your class how solids, liquids and gases connect to everyday life... especially life in the kitchen!!

During our Discovery Day we made ICE CREAM with the munchkins!! We followed the steps in this YouTube video to make our ice cream:


When you do this activity, you'll need to make sure your students shake the bag REALLY well... otherwise the experiment won't work and you'll have some disappointed kiddos on your hands.


It can get tiring after a while, so we had each student shake the bag for a bit and then they passed it onto the next person.  This way everyone got a chance to be involved as well!

I haven't tested the video below out yet, but it looked too good not to share!! I might make it my little weekend project to test this recipe out...mmm!!


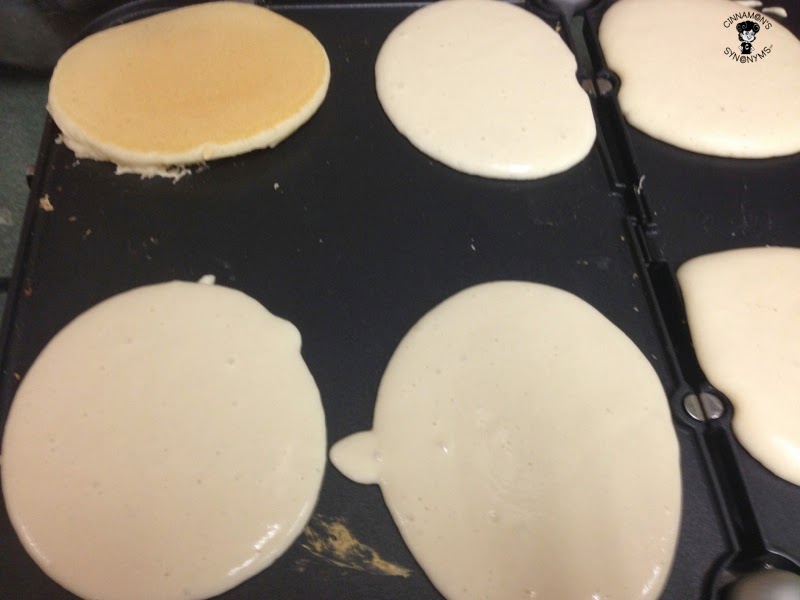
The other Discovery Day station we organized was a pancake station.


Our students sure had fun, and I just loved how each experiment we did showed them the various factors that can turn a liquid into a solid:

1. churning (butter experiment)
2. mixing different substances (oobleck experiment
3. cooling & agitating (ice cream) 
4. heating (pancakes) 

Teaching science vocabulary in an engaging and hands-on way is definitely the best way to get students to understand new terms and concepts in science!
As the proverb goes:
"Tell me and I will forget. Show me and I will remember. Involve me and I will understand"

Also, by keeping my Matter Spot It & Steal It game out throughout the year, these important science terms will stay fresh in students' minds! The game is perfect at a center; for early finishers; or for those moment when you just need to fill in 5 minutes before the bell rings!

Now for a little side note:

If you follow my blog and have been waiting for me to put up this post...would you believe that this was ready to go ages ago... I was just hoping to add some pics of my students playing the Matter game before posting.  I'm always forgetting to take these pictures and planned on doing that today...

... then this happened:


SNOW DAY!!
Do you see the imprint of my door, ha! Oh, and this is a morning shot... blah... I hate how dark winter mornings are :(

Determined to publish this post no MATTER (pun intended) what... so it doesn't end up staying in my 'drafts' folder forever, I figured maybe the pics of my students having fun with the game will just have to wait!

Posted! Goal accomplished!

Now time to snuggle with my boy while watching a movie!
Snooowwww dayyyy!! Wooo hoo!!

Monday, January 19, 2015

Solids and Liquids Part 2: Making Oobleck

In my last post about "Making Butter", I said to check back soon because I'd be blogging about more fun ways to teach 'solids and liquids'... little did I know that it would take me nearly 4 weeks to get to this post. I'm so sorry. I have a tendency to bite off a bit more than I can chew (both literally and figuratively haha!)... sometimes this means my blog gets a bit neglected.

Although this happened before the winter break, our 'Science Discovery Day' was way too much fun not to blog about... even if it did happen nearly a month ago (wow, time flies!!).

Since there are 6 of us teaching grade 2, we all paired up and took control of a 'station' which we set up in our classrooms. Our classes also paired up and traveled from room to room visiting each station throughout the day.

When we were planning the discovery day I knew I had to run a station that involved oobleck. This solid/liquid just fascinates me! (I'll admit, I'm like a child... I get excited by the littlest things!)


Oobleck is really easy to make. All you need is 2 cups of cornstarch for every cup of water.
We added green food coloring to make it look a bit like slime.

This kiddo was having fun doing "magic tricks" with the oobleck:


When you let the oobleck sit, its starts to get all runny. The more you move it around, the more it behaves like a solid.


The moment I caught sight of this little girl, my heart just filled with joy. Ah kids... so carefree and oblivious. You should have seen her face: white powder ALL over!


During my planning period, I just had to sneak a peak at some of the other classes to see how things were going. I will blog about that in Part 3 of my Solids and Liquids series. (The post will include tips on how to make ice cream with your class!!).

To help my students keep new science terms fresh in their minds, I created this fun little game. You can grab it HERE. (UPDATE: This game is undergoing revisions and will be available in my store soon.) The game helps students build science vocabulary in an engaging way!


We are starting our water cycle unit next... I think it just makes sense to teach it next so students can see how solids, liquids and gases connect to the water cycle! I created these word wall cards as another way to reinforce new science terms. You can get these cards HERE.  [Note: In the word wall set, the words "solid", "liquid", "gas", and "matter" are also included].


Alrighty... stay tuned for my ice cream post... I'm hoping I get to it faster than 4 weeks :S  How people manage to blog every day bloggles my mind (ha, get it.. boggles, bloggles)... It's late... I should go to bed... cheesy jokes start when I'm sleep deprived ;)


Wednesday, December 10, 2014

Liquids & Solids Part 1: Making Butter


Yesterday, we had a special visitor from the dairy farm!

We learned how to make butter!! It was definitely a fun intro to our unit on solids and liquids!!

First, we looked at all the products you can make from milk. I would seriously cry if I ever became lactose intolerant... ice cream, cheese, whipped cream, butter... ohhh... I love dairy!


Next, the munchkins sorted the products.


Then...

We had to test out the steps to see what would happen!!!


They had way too much fun with this next step. Do you see my boy in red... he was warming up for his turn! Ha, ha!


This part was important!!


So, after a bit more shaking, it started to look (and sound) just right!


Do you see the butter. It's like MAGIC!


Mmmm.


Creamy goodness!


This activity was a great way to inspire some descriptive language because all of our senses were used during the butter making process! 

To  SPICE UP their vocabulary, I modeled other ways of saying “soft”, “smooth”, “yummy”, and “yucky”! Yes, that's right.. 'yucky'... because a few of my kiddos were reluctant to try the butter. They missed out though...  it was absolutely creamy and scrumptious

Check back for my next post, because we'll be having more fun with solids, liquids and gases!!


Related Posts Plugin for WordPress, Blogger...