Sunday, December 27, 2015

Time to the hour and half hour {Spot It & Steal It}

With new year's eve creeping up, I thought it would be the perfect time to introduce the concept of time to my lil Cinnabun. He has been showing an interest in watches and telling time, so I figure... why not nurture his interest. Plus, since new years is all about watching the clock strike 12, it just seemed like perfect TIMING ;)

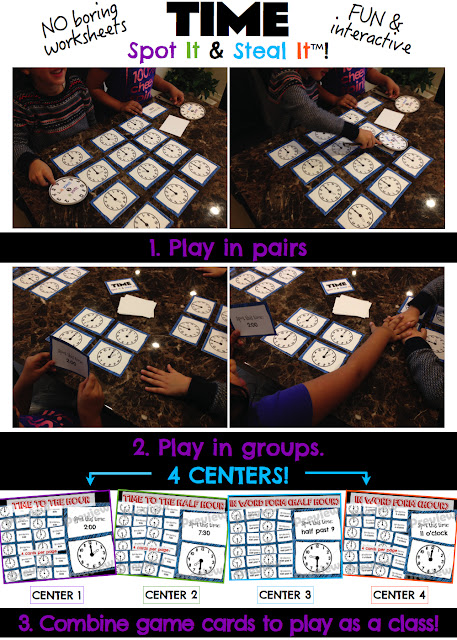
My son loves playing card games so I knew that he would enjoy my new TIME Spot It & Steal It game. The interactive element of the game is just what he needs - he is not into boring worksheets!! This pack comes with hour and half hour cards!

Yesterday we were with the fam so my lil man got to play the game with his cousins! I love how they were learning without even realizing it!!


Here's how to play in pairs: Lay out all the "picture cards" and take turns reading the "spot it" cards. Reading the cards allows kids to practice reading the time in different ways. I have included "spot it" cards that are written in word form and digital form.

Whoever spots the "picture card" that corresponds with the "spot it" card can SPOT IT (or in this case, SWAT it!) & STEAL it!!

You can put this little spin on any of my Spot It & Steal It games if you'd rather have students use the cards in pairs versus groups!! All you need is a fly swatter!

I left my swatters at school so I made my own with a spatula and yogurt lid! I just inserted the paper into the lid and voila - homemade Time Spot It & Steal It swatter done! I actually like it better than a boring ol' fly swatter... so it all worked out!

You can download the template for free HERE.


Later, my nephew wanted to join so we changed the set up to allow for more players.


In this set-up, each kid gets 2-4 cards (depending on how many players) and they take turns reading the "spot it" cards.  Again, if you spot it, you can steal it! The player with the most cards wins!!


You can save your card from being stolen by slapping your card before anyone can steal it!! This element of the game really forces everyone to pay attention! It also increases the FUN factor!

If you want to use this game in your classroom, you can use it in the ways mentioned above (in pairs or small groups)... but you can also play as a class. Just combine a couple of the centres in the pack (there are 4 centre options) to play as a class.


time, games, hour, half hour


CLICK HERE TO GET THIS GAME! 


Friday, August 14, 2015

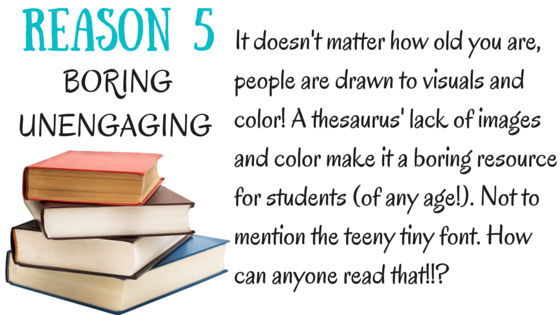
5 Reasons You Should Get Rid of Your Classroom Thesauruses & Why You Should Use Picture Thesauruses Instead!!

Several years ago I was teaching grade one and then moved onto teaching grade 4 the year after - a huge jump! One thing that really stuck with me is how:
1. The elementary grades had limited resources to help students write descriptively (i.e., a thesaurus isn't exactly a kid friendly tool).
2. It was NO DIFFERENT in the higher grades. Students would often select synonyms at random when asked to be more descriptive! A regular thesaurus was just not cutting it.

This is when I KNEW I had to create a resource to help my students... something that would serve as the "Angry Birds" of thesauruses. Like Angry Birds, it had to be something young kids could use (and enjoy) just as effectively as older students.


After hearing from all the wonderful teachers who have left me feedback on my Picture Thesauruses (click HERE to read all the feedback comments), I am delighted to know that teachers spanning from the elementary grades to the upper grades...and even up to high school... are enjoying the books.  If this is your first time hearing about the books... or you're on the fence about grabbing a set for your class, this post serves to show you 5 REASONS why I think you should get rid of your classroom library of thesauruses and use Picture Thesauruses instead! Oh, and I have a couple of FREE books for you to try out... keep reading... the links are at the end!

You can also ENTER TO WIN a Picture Thesaurus Bundle AND a $100 TpT Gift Card!!
{You'll see more details on this at the end of this post!}

Here is an example of a page in a Picture Thesaurus booklet, just to give you an idea of how they are organized. 


A complete booklet would look something like this:


Now for WHY I got rid of my classroom thesauruses and created Picture Thesauruses to use with my students instead:


My Picture Thesauruses get used A LOT in my class... so I also created some quick reference cards that students can use when a booklet is in use. Once students have used the booklets several times, and have a sense of the word they're looking for (but just need to double check spelling etc.), the reference cards are the perfect tool.

You can also choose to use them in an interactive notebook! Click the image below to learn more!

If you're thinking "How will I organize the Picture Thesauruses in my classroom?", I have some ideas for you!
I put my cards on magnetic hooks on the black board:


But you could also put them on a cork board with push-pins:
(Thanks Amy Mezni from Teaching Ideas 4U for snapping a pic of how you organize them in your class!!).


She sent me a message the other day saying she had room for a few more books on the bottom and that I should get on it and add some MORE in my store!! Well, little did she know, I was in the middle of adding "SAID" to my store just as she sent me the message! Ask and you shall receive, haha! 

Another option is to put the books on a peg board. 
I organize my books by senses (the 5 senses + emotions). 


For the longest time I just had them on the ledge of my blackboard. Whatever works!!

NOW... if you want to WIN A SET for your class ENTER the raffle below!!

To enter all you have to do is download the FREEBIES listed below and leave a lil love in the feedback section for each book in my store! 


It really is a win-win... you were going to download these freebies anyway!!!

a Rafflecopter giveaway
WAIT...that's not all I'm giving away!! My friends at the Lesson Deli and I are ALSO giving away a $100 TpT GIFT CARD!! This is happening on our collaborative blog, here:


But before you make your way there, be sure to hop on to the next blog in our hop!


Tuesday, April 14, 2015

Go Green!

Earth Day is just around the corner... but at our school Earth Day truly is EVERY DAY... because we are an ECO SCHOOL! Nevertheless, it is nice to have these special days to inspire extra awareness around the impact our decisions have on our planet!

Several weeks ago, our school celebrated Earth Hour by turning off all the lights for an hour and unplugging our electronics! Our window lets in a lot of light so we didn't have to work in complete darkness at all.  It was neat because it made us realize just how much energy we actually get from the sun. Maybe we will work with the lights off more often!

I introduced the class to my Go Green Spot It & Steal It game cards the week of Earth Hour and we've been using the pack for various activities ever since...not just for playing the game!


You can use all my games in the ways I'm about to describe...so if you have the Figurative Language set for instance, you can use the same strategies.

One example: Instead of creating my own anchor chart, I like having my students get involved in the process. We use the black and white versions of the game cards to do this!

Recently, I asked my students to brainstorm ways that we could be kind to the Earth. Each time a student mentioned an idea that I had a "picture card" for, I handed the black and white version of the card out to the student who shared the idea. For this game, I had enough cards to hand out to everyone. For the games where I don't have enough picture cards for the whole class, I just use the colored cards and have students put them up as key ideas/concepts are mentioned. {You can see an example of how I did this with my Graphing Spot It & Steal It cards HERE}

After our brainstorming session, students colored in their cards:
Then we pasted the cards onto chart paper! You could also use the cards to create a display or make a class book! For the book, you can have students write a blurb about how they conserve energy at home and place this with the picture.


I think there's real benefit in doing a collaborative anchor chart because students are more likely to refer to it if they played a role in creating it.

We are now working on creating Earth Day posters! Students used the anchor chart to come up with ideas for their posters! Since they had tons of ideas to refer to, they had no problem coming up with a plan!  Below, you can see students gathered around the chart!


Next week we will play the game!

So you see, my Spot It & Steal It games can act as a word wall (see that post HERE); you can create an anchor chart; have students write a class book; put the cards up on a bulletin board for a visual reminder; use it as a GAME to review concepts... and more. The options are endless!

Here are some more of my Spot It & Steal It games! Click on a box to learn more!

Wednesday, April 1, 2015

Art with Jenny K!

Can I just say thank goodness for Jenny K!! I just love the guided art lesson on "How to Draw a Bunny" that she has on her blog!

Students can add their own flair to the bunnies by deciding how to finish them off.   I had my students come up with a design for the center (using various types of lines and shapes - we reviewed these first).  They also picked a medium of their choice.

A couple of them chose to use pastels...


...but most chose paint (surprise, surprise!!).

Although I have paints for every color in the rainbow,  I decided to give my kiddos ONLY the primary colors so that they could create their own hues.


To my delight, there was some great vocabulary building going on...

"I made TURQUOISE!"
"I made a ZOMBIE COLOR" {LOL}
"This looks MAROON"

...were just some of the descriptive color words (and phrases) I heard!

I'm sure if I had just given my kiddos all the paint colors to start with, these conversations would not have taken place! Instead, I might have heard "Can you pass me the purple please!".

We also added art terms to our vocabulary like: hue, shade, tint, primary colors, secondary colors, as well as words to describe various types of lines (horizontal, vertical, wavy etc.)!  See, art can turn into a mini language lesson too!

Back to the paints... when I bring out paints, I like to use q-tips!  For starters, they allow students to get into all those tiny details. But to be completely honest... it just makes clean up a BREEZE!! No paintbrushes to wash, no fuss, no muss!


We used small paper plates as pallets (another easy clean-up solution!).  Three plates were used for the primary colors and students were given a plate of their own to experiment and mix!

I'd love to hear your easy clean up solutions when it comes to painting! Comment below!

Friday, March 27, 2015

Would You Rather...

This week we worked on persuasive writing.

Prior to getting my students to write I like to give them time to talk about their ideas, out loud, with a partner.  This helps them generate ideas and synthesize their thinking. Sometimes we skip the oral discussion part and I just get kids to write freely ...depending on the writing task, that works too! However, for our first crack at persuasive writing I knew that the oral component would result in stronger, well thought out arguments when it came down to the writing part.

I stumbled upon this "Would You Rather..." activity on my FB feed the other day and knew it would be the perfect 'hook' for my persuasive writing lesson.  You can grab it for FREE!

It's such a fun intro to persuasive writing because, let's face it: who doesn't love talking to their best bud during class about ridiculously funny scenarios.

For each question, I got students (in pairs) to highlight their choice, then they had to come up with at least 3 reasons to defend their opinion. They did this orally first.


If their buddy made the same choice, they could come up with reasons to defend the choice together. If the opinions differed, they were encouraged to challenge the validity of their partner's arguments. This inspired students to think critically about their reasons and also helped to eliminate 'weak' reasons such as, "...because I like it".

After going through all the scenarios, students selected ONE to write about.


I think throwing in a bit of 1. choice 2. humor and 3. time to think ideas through with a buddy, really helped my students when it came down to the writing part! Plus, the fact that my kiddos were engaged and laughing while learning made this lesson a home run in my books.  But, they weren't the only ones having fun.. eavesdropping was hil-ar-ious! Eight year olds say some pretty funny things!


Monday, February 2, 2015

Solids and Liquids Part 3: Making Ice Cream in a Bag

Making ice cream is such a delicious way to show your class how solids, liquids and gases connect to everyday life... especially life in the kitchen!!

During our Discovery Day we made ICE CREAM with the munchkins!! We followed the steps in this YouTube video to make our ice cream:


When you do this activity, you'll need to make sure your students shake the bag REALLY well... otherwise the experiment won't work and you'll have some disappointed kiddos on your hands.


It can get tiring after a while, so we had each student shake the bag for a bit and then they passed it onto the next person.  This way everyone got a chance to be involved as well!

I haven't tested the video below out yet, but it looked too good not to share!! I might make it my little weekend project to test this recipe out...mmm!!


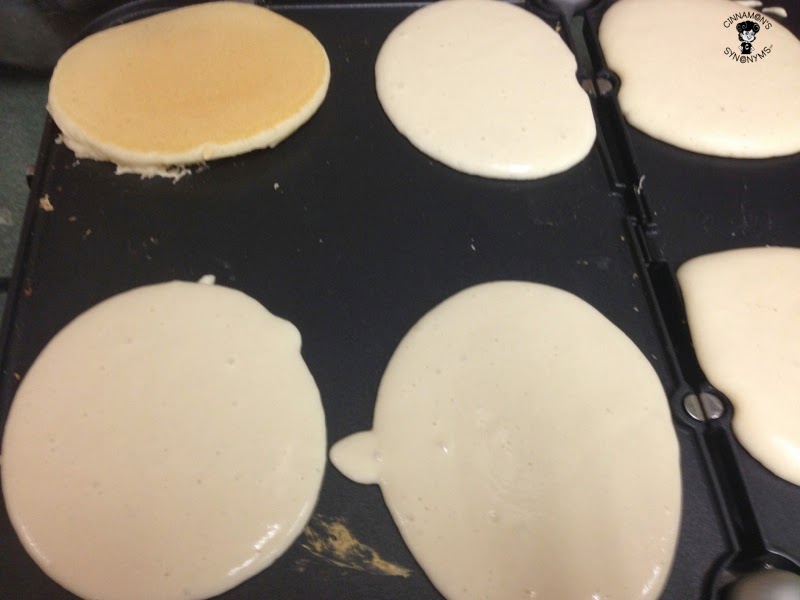
The other Discovery Day station we organized was a pancake station.


Our students sure had fun, and I just loved how each experiment we did showed them the various factors that can turn a liquid into a solid:

1. churning (butter experiment)
2. mixing different substances (oobleck experiment
3. cooling & agitating (ice cream) 
4. heating (pancakes) 

Teaching science vocabulary in an engaging and hands-on way is definitely the best way to get students to understand new terms and concepts in science!
As the proverb goes:
"Tell me and I will forget. Show me and I will remember. Involve me and I will understand"

Also, by keeping my Matter Spot It & Steal It game out throughout the year, these important science terms will stay fresh in students' minds! The game is perfect at a center; for early finishers; or for those moment when you just need to fill in 5 minutes before the bell rings!

Now for a little side note:

If you follow my blog and have been waiting for me to put up this post...would you believe that this was ready to go ages ago... I was just hoping to add some pics of my students playing the Matter game before posting.  I'm always forgetting to take these pictures and planned on doing that today...

... then this happened:


SNOW DAY!!
Do you see the imprint of my door, ha! Oh, and this is a morning shot... blah... I hate how dark winter mornings are :(

Determined to publish this post no MATTER (pun intended) what... so it doesn't end up staying in my 'drafts' folder forever, I figured maybe the pics of my students having fun with the game will just have to wait!

Posted! Goal accomplished!

Now time to snuggle with my boy while watching a movie!
Snooowwww dayyyy!! Wooo hoo!!

Monday, January 19, 2015

Solids and Liquids Part 2: Making Oobleck

In my last post about "Making Butter", I said to check back soon because I'd be blogging about more fun ways to teach 'solids and liquids'... little did I know that it would take me nearly 4 weeks to get to this post. I'm so sorry. I have a tendency to bite off a bit more than I can chew (both literally and figuratively haha!)... sometimes this means my blog gets a bit neglected.

Although this happened before the winter break, our 'Science Discovery Day' was way too much fun not to blog about... even if it did happen nearly a month ago (wow, time flies!!).

Since there are 6 of us teaching grade 2, we all paired up and took control of a 'station' which we set up in our classrooms. Our classes also paired up and traveled from room to room visiting each station throughout the day.

When we were planning the discovery day I knew I had to run a station that involved oobleck. This solid/liquid just fascinates me! (I'll admit, I'm like a child... I get excited by the littlest things!)


Oobleck is really easy to make. All you need is 2 cups of cornstarch for every cup of water.
We added green food coloring to make it look a bit like slime.

This kiddo was having fun doing "magic tricks" with the oobleck:


When you let the oobleck sit, its starts to get all runny. The more you move it around, the more it behaves like a solid.


The moment I caught sight of this little girl, my heart just filled with joy. Ah kids... so carefree and oblivious. You should have seen her face: white powder ALL over!


During my planning period, I just had to sneak a peak at some of the other classes to see how things were going. I will blog about that in Part 3 of my Solids and Liquids series. (The post will include tips on how to make ice cream with your class!!).

To help my students keep new science terms fresh in their minds, I created this fun little game. You can grab it HERE. (UPDATE: This game is undergoing revisions and will be available in my store soon.) The game helps students build science vocabulary in an engaging way!


We are starting our water cycle unit next... I think it just makes sense to teach it next so students can see how solids, liquids and gases connect to the water cycle! I created these word wall cards as another way to reinforce new science terms. You can get these cards HERE.  [Note: In the word wall set, the words "solid", "liquid", "gas", and "matter" are also included].


Alrighty... stay tuned for my ice cream post... I'm hoping I get to it faster than 4 weeks :S  How people manage to blog every day bloggles my mind (ha, get it.. boggles, bloggles)... It's late... I should go to bed... cheesy jokes start when I'm sleep deprived ;)


Related Posts Plugin for WordPress, Blogger...